

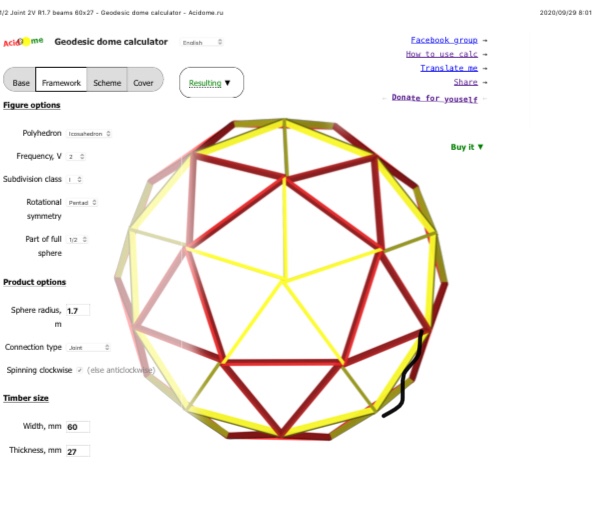
世の中には便利なものがある、ジオデシックドームを作るならネット上に計算ソフトがいくつかあり直径やスタイルを入れれば設計図が出来てしまう。自分は”acidome”を利用。
Acidome is the one I used for calculating the geodesic dome. You type in radius of the dome you like and choose the menus. That’s it! You get a full plan for your dome.
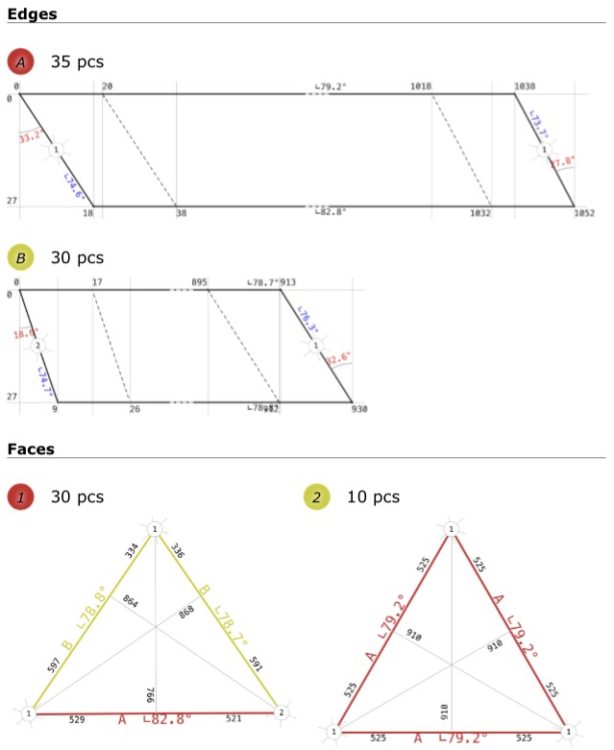
チョイスしたスタイルはV2で繋ぎはjoint、理由はパーツの種類の少なさと加工しやすさ。これだと二種類の長さで両端を一度づつ切れば加工は終わる。興味がある方はacidomeへ!
My choice is V2 with Joint connection. It was the simplest one on V2. Just two different parts, four edges to go!
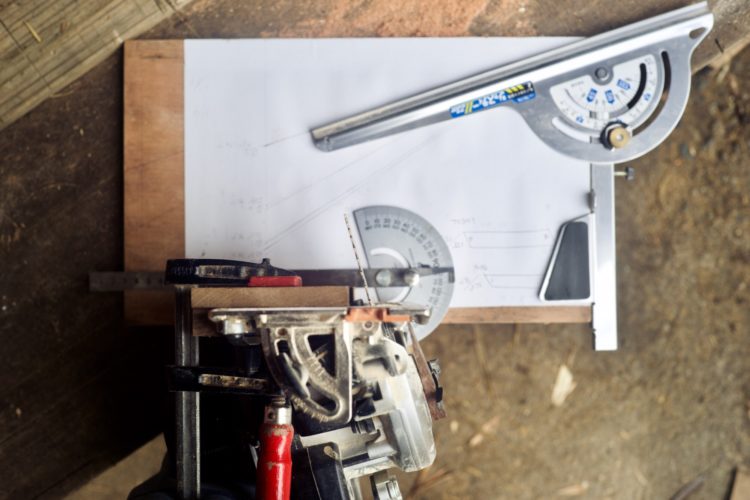
加工はスライド丸鋸があればちょー簡単だけど持ってないので丸鋸でのカット。大事なのは準備、丸鋸を自作のジグに乗せて目で角度を合わせる。あと小屋を建てた時に買ったけどほぼ使わなかったジャスティー(角度定規)がガイドとして活躍してくれて嬉しい。
A radial arm saw would be nice for this kind of cut but I don’t own it. I have a normal circular saw which works too. You should make a gig for the right saw angles.
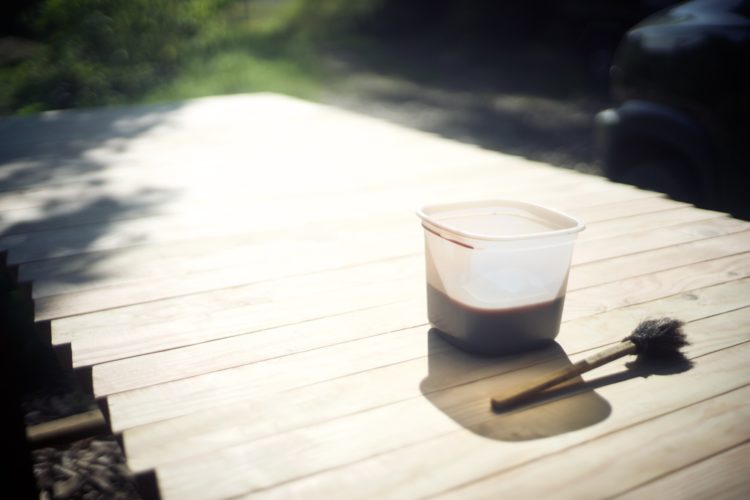
長さが2種類、両端がそれぞれ角度が違うので4回刃の傾斜角と切削角を変えて切るのみ、ジグを作るとこから半日作業。ただ荒材だからディスクグラインダーで表面を削るのに1日かかった、組む前に柿渋原液で一度塗り。
I cut all 65 struts in a half day. Thanks for the gig I made. It worked well. But it was untreated wood so I spent a whole day filing them. Then stained with straight persimmon tannin.

Edge1で正三角を10個、Edge1と2を組み合わせて二等辺三角形を5個、頂点部分をEdge2で星形に組む、余ったEdge2×15本で全体を繋いでいく。次回は建前!
10 triangles with Edge 1 and 5 Isosceles triangle with Edge 1&2. The top part is 5 Edge 2 shaped like a star. That was the preparation for the giant LEGO!
コメントを残す