
 遂に全ての木材が到着!先ずは材をひとつひとつ見ながらどこに使うかを選り分けていく、乾燥材だけど色の濃いのは後から暴れる可能性があるらしい、でも丈夫だから床下などに使うと良いよと大工の杉山さん。確かに色が濃いものはずっしりと重い、因みに全て檜。
Yeah it’s all here, all the woods I’ve been waited for. First thing first, checked all the woods and separated them in sections. Sugiyama sensei who prepared these for us is a super carpenter. He told me if it has deep color it might bend later but those are heavy and strong so to use under floor would be the best. Yeah it’s easy to notice the weight differences. BTW all of them are Japanese cypress.
90×90×4,000mm 10pieces
90×90×3,000mm 40pieces
120×30×3,000mm 160pieces
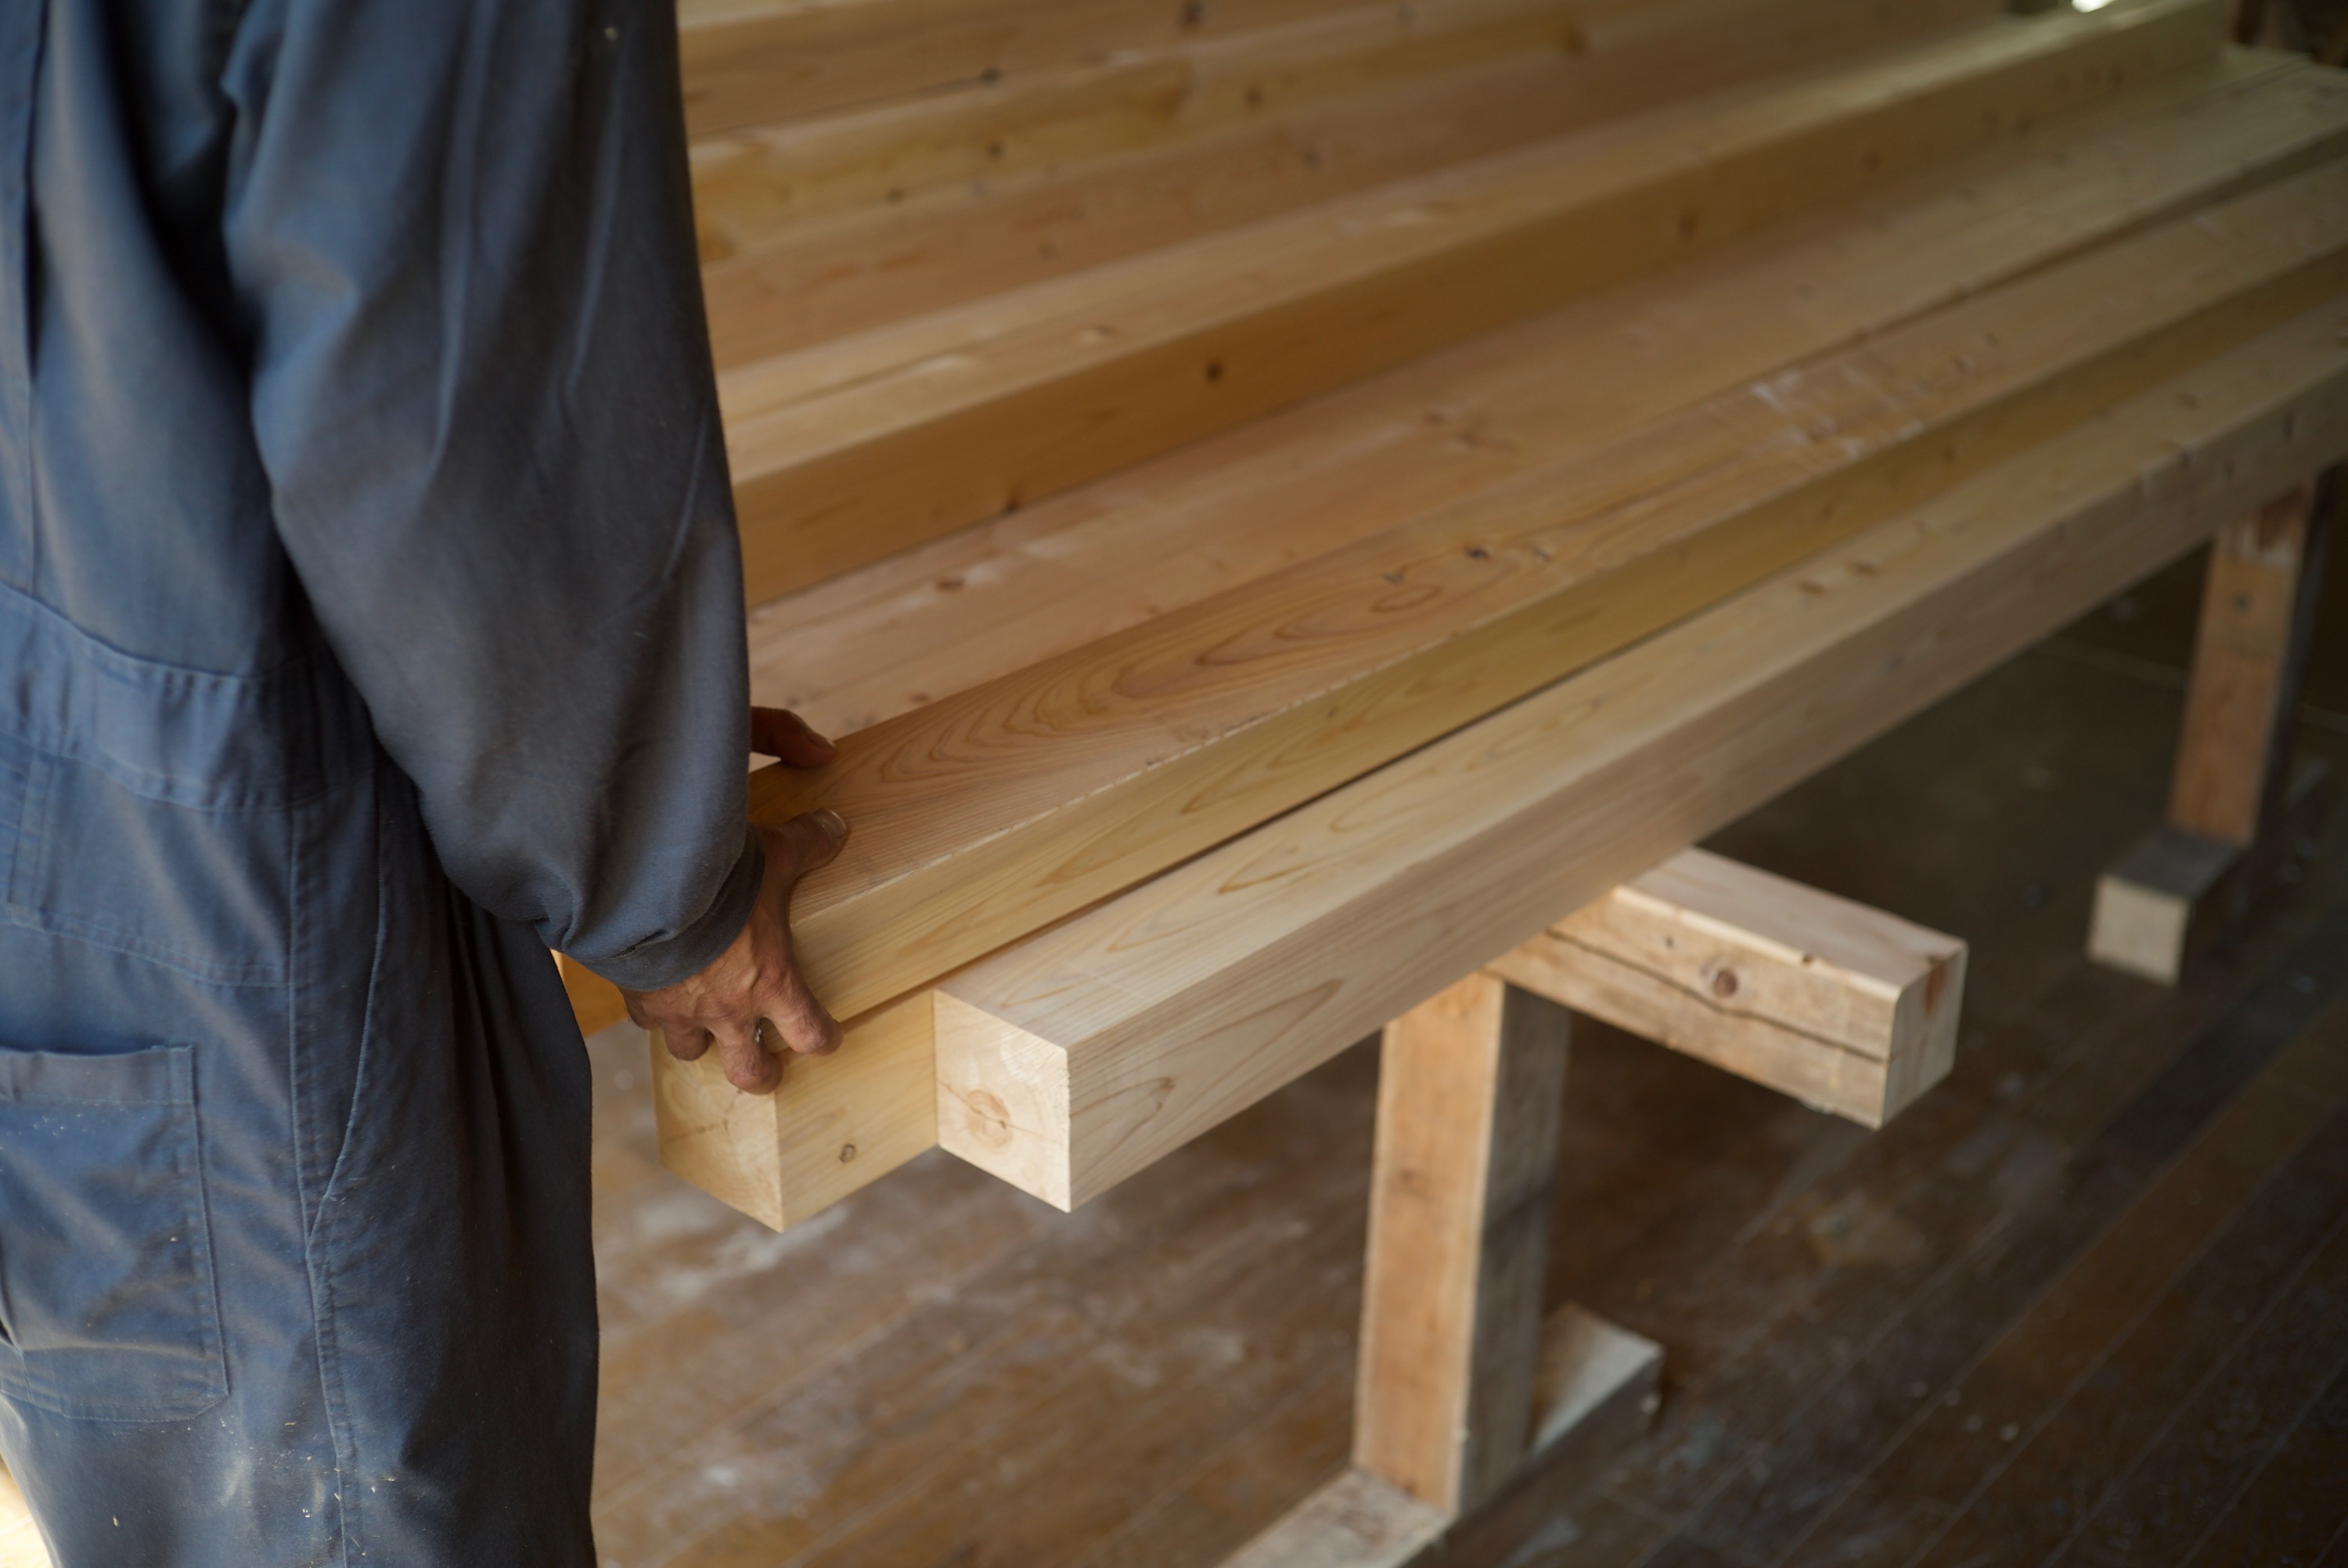
今回は釘も金物も使わず材をパズルの様に加工、柱に溝を掘り間に30mm厚の板を落とし込む板倉工法と言う伝統工法を基本とする為ほぼ全ての材が見える。精度もかなり必要になるから杉山さんの勧めで材の等級を上げた、種類も杉から檜に。この板倉工法、本当は120mmの角材に30mm厚の杉板を使うのが基本みたいだけど小さな小屋なので全て90角でチャレンジ。
I’ll use Japanese traditional method called “ITAKURA”. Basically using wood for everything. Pillars, walls, floor and roof. It need precise marking and cutting since it’s all wooden construction without nails. There’re ranks for the timber and I was thinking to get cheep ones but my sensei told me to get the higher rank. So that even someone never done any carpenter work before like myself could work easily. I like challenges but if it’s more efficient then I follow yes sensei.
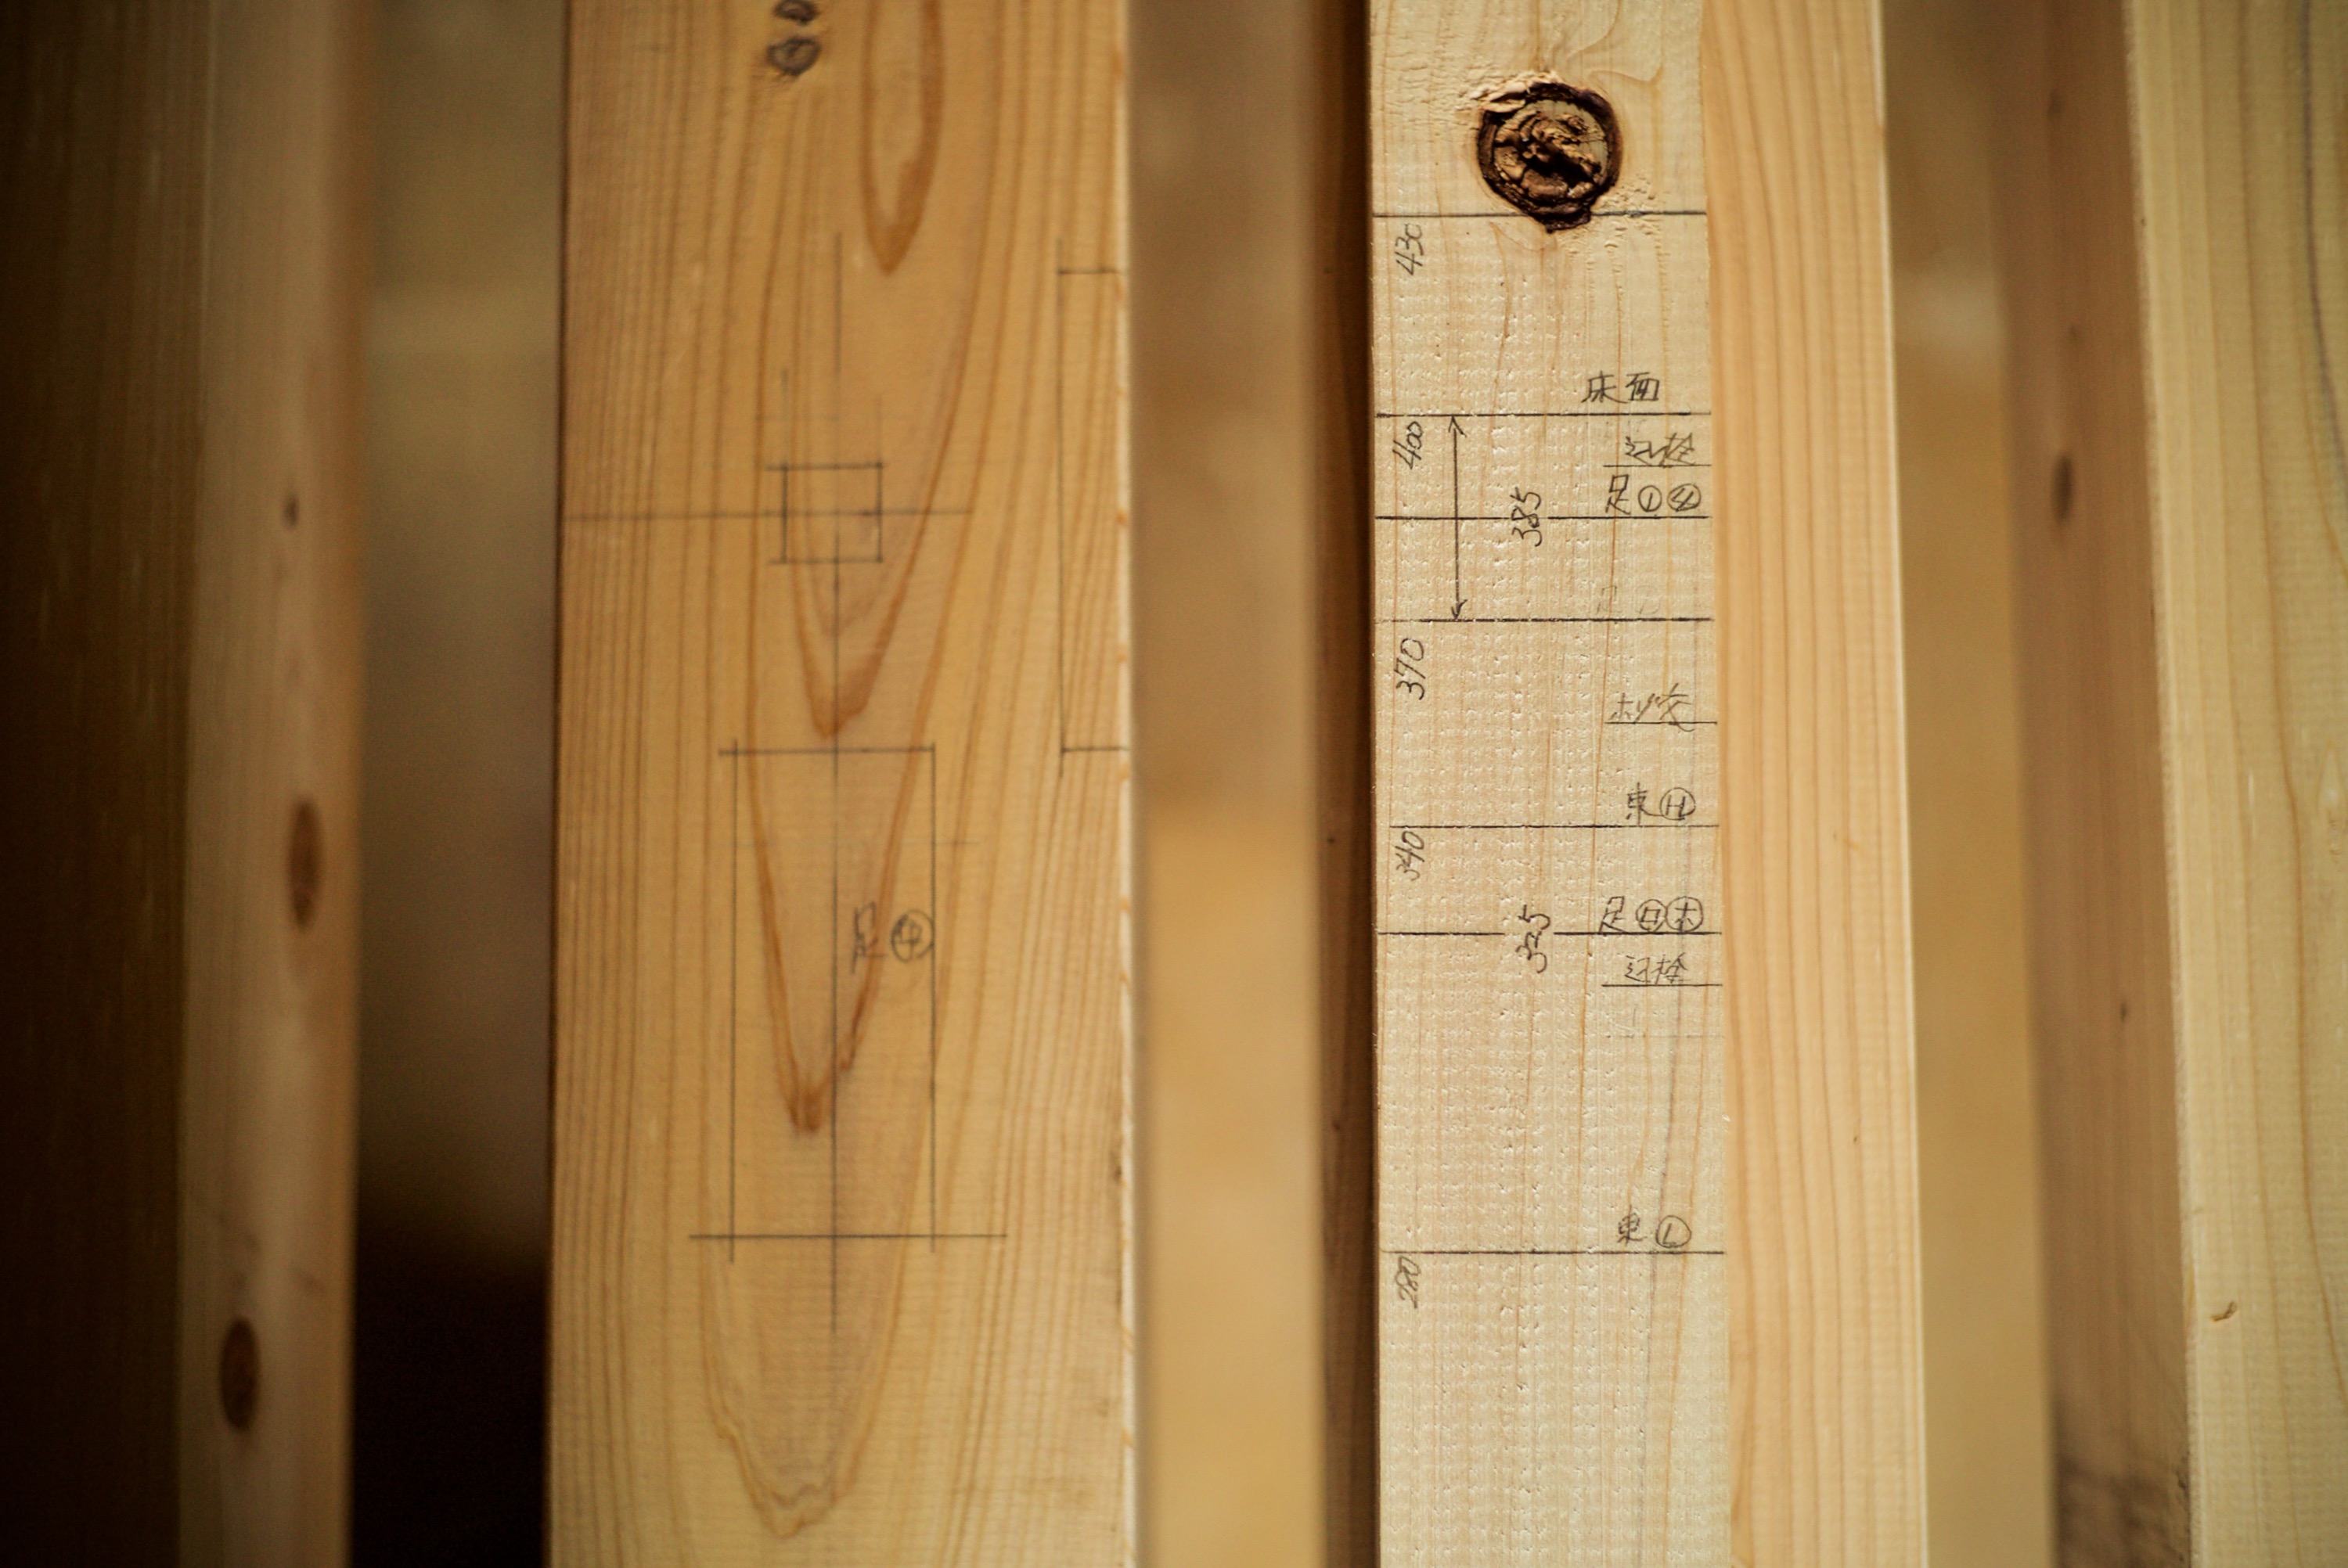
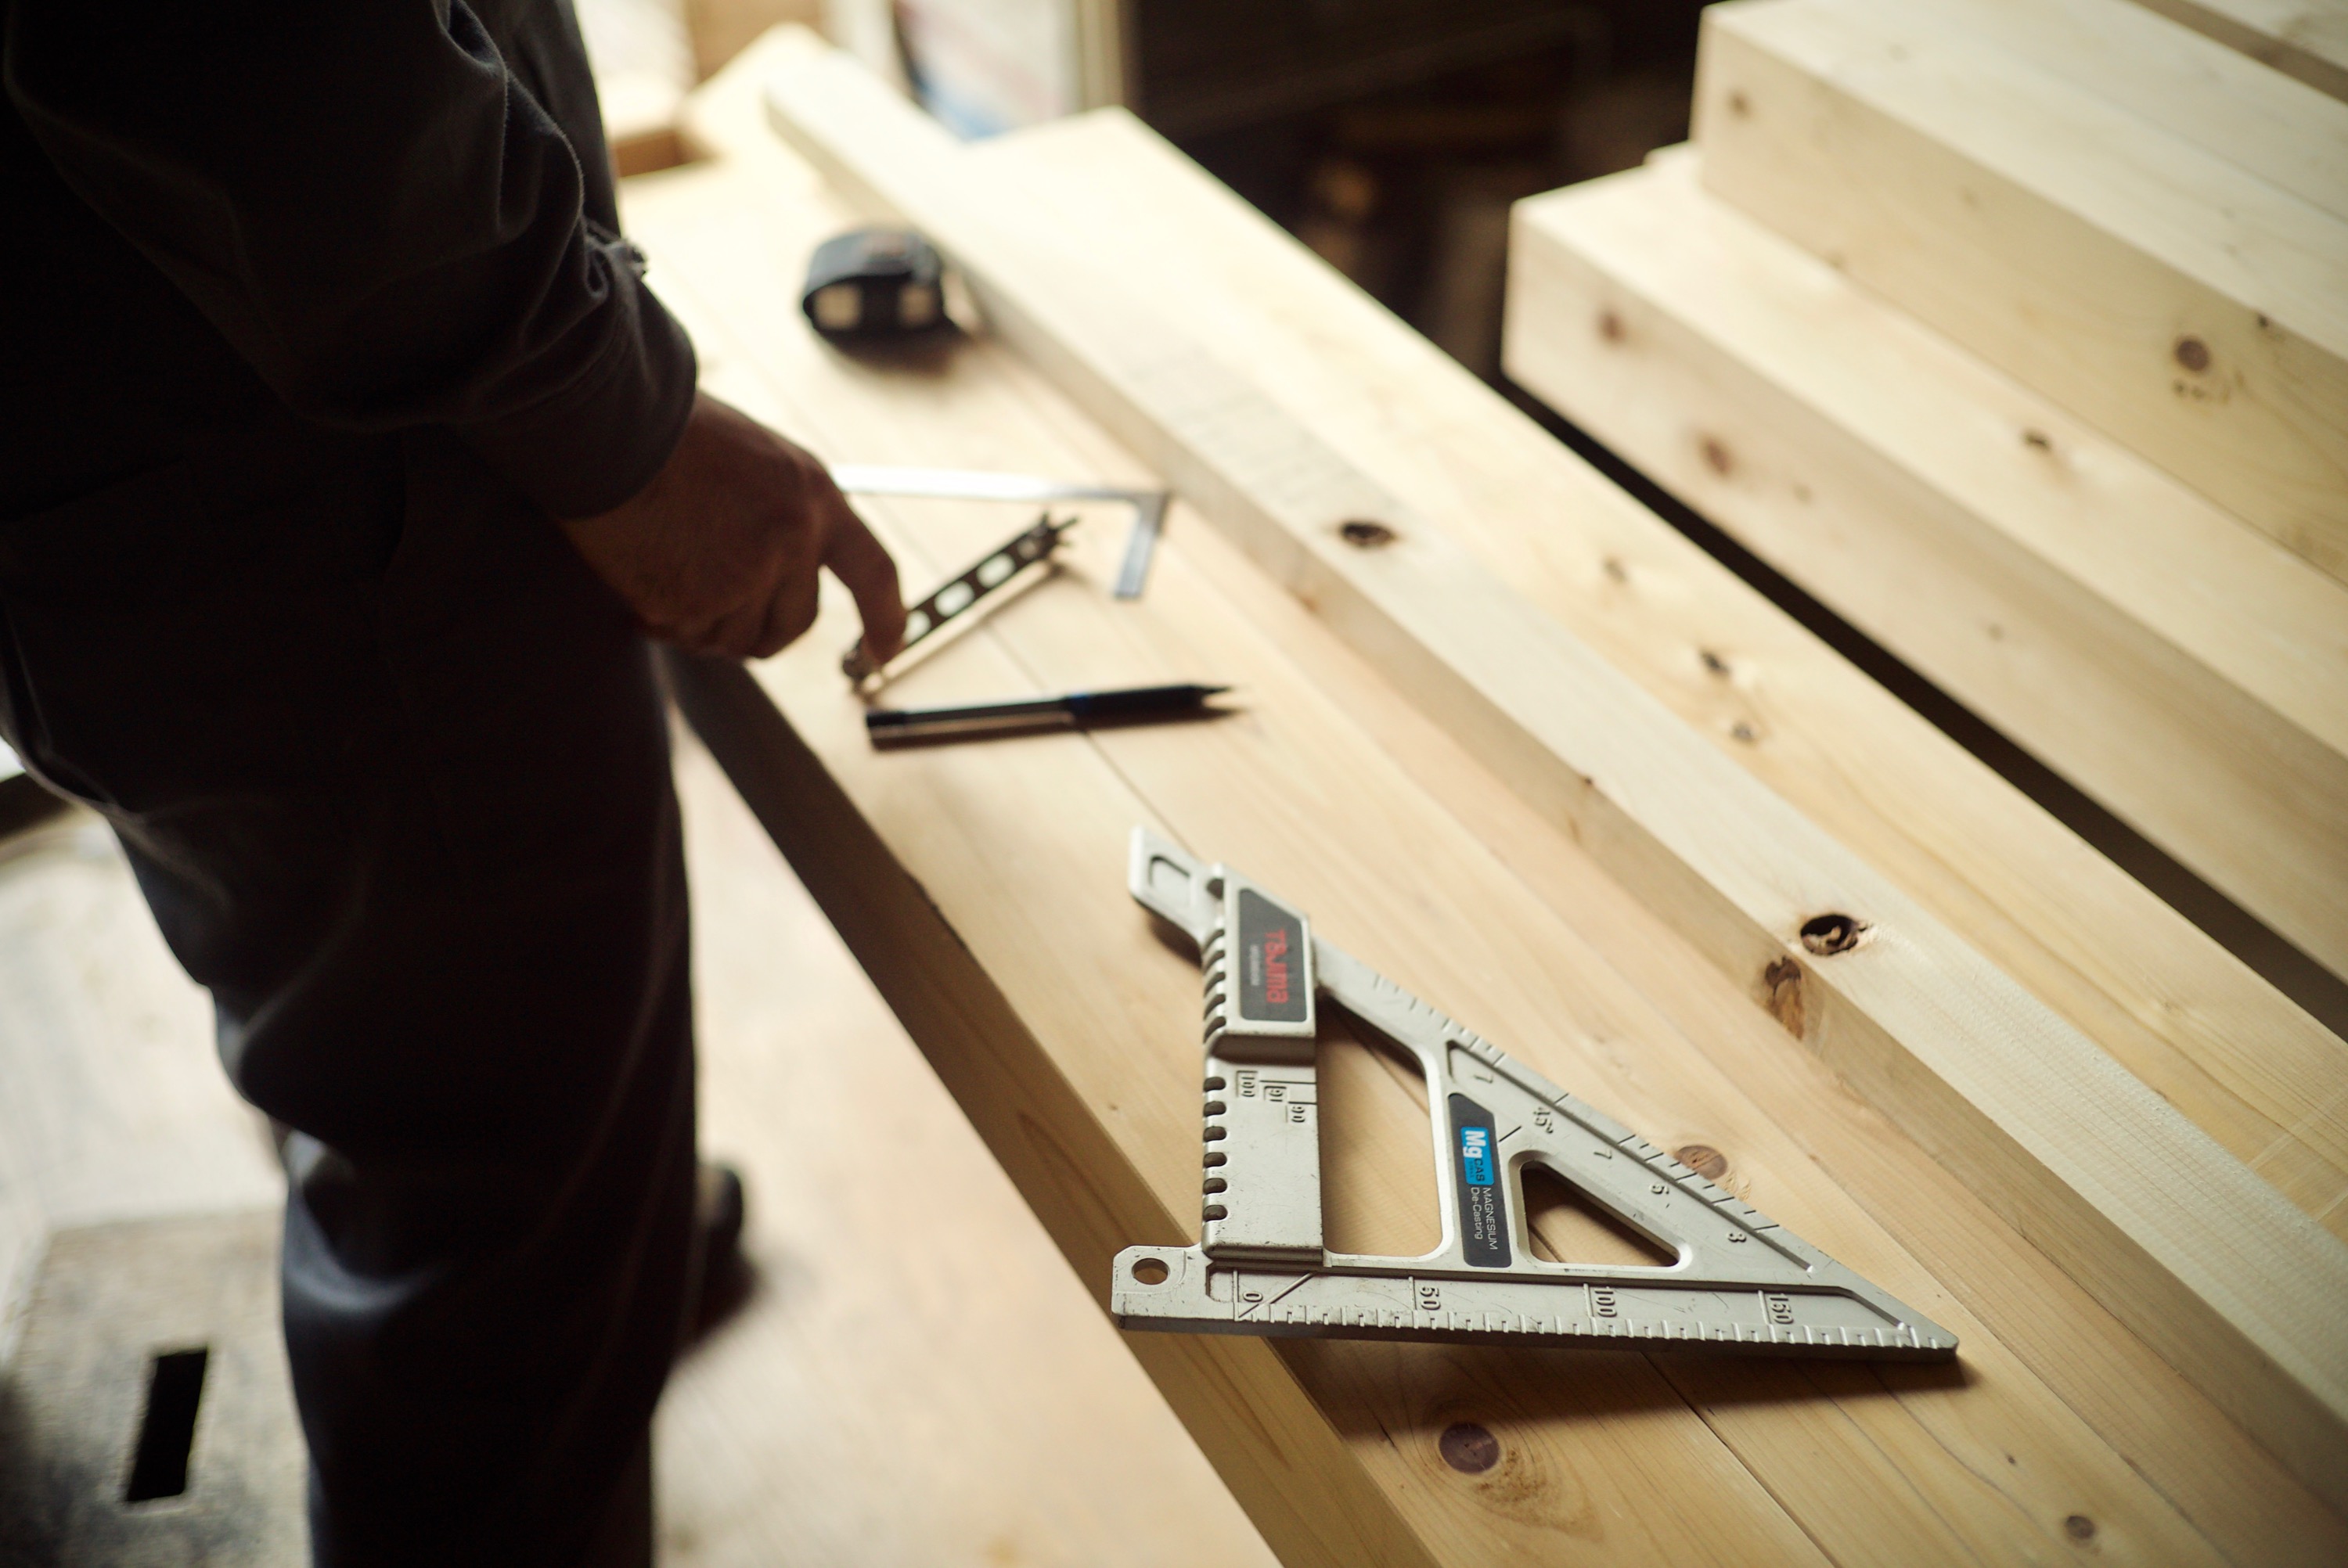
墨付けにまず必要なのが間竿と言われるもの、基準となる910mm(3尺)幅で印を付け、それを材に移していけば毎回測る必要もなく誤差も少なくなる。素人なりに試行錯誤して設計した図面から基準の3尺と共に何本か共通して必要な印もつけておいた。見えてる表が柱用、裏が横架材用である。
We call it “kanzao” which is a scale with all you need marks. You copy the marks from it so you have more precise marking on each wood. I made this side for pillars and the other for horizontal ones.
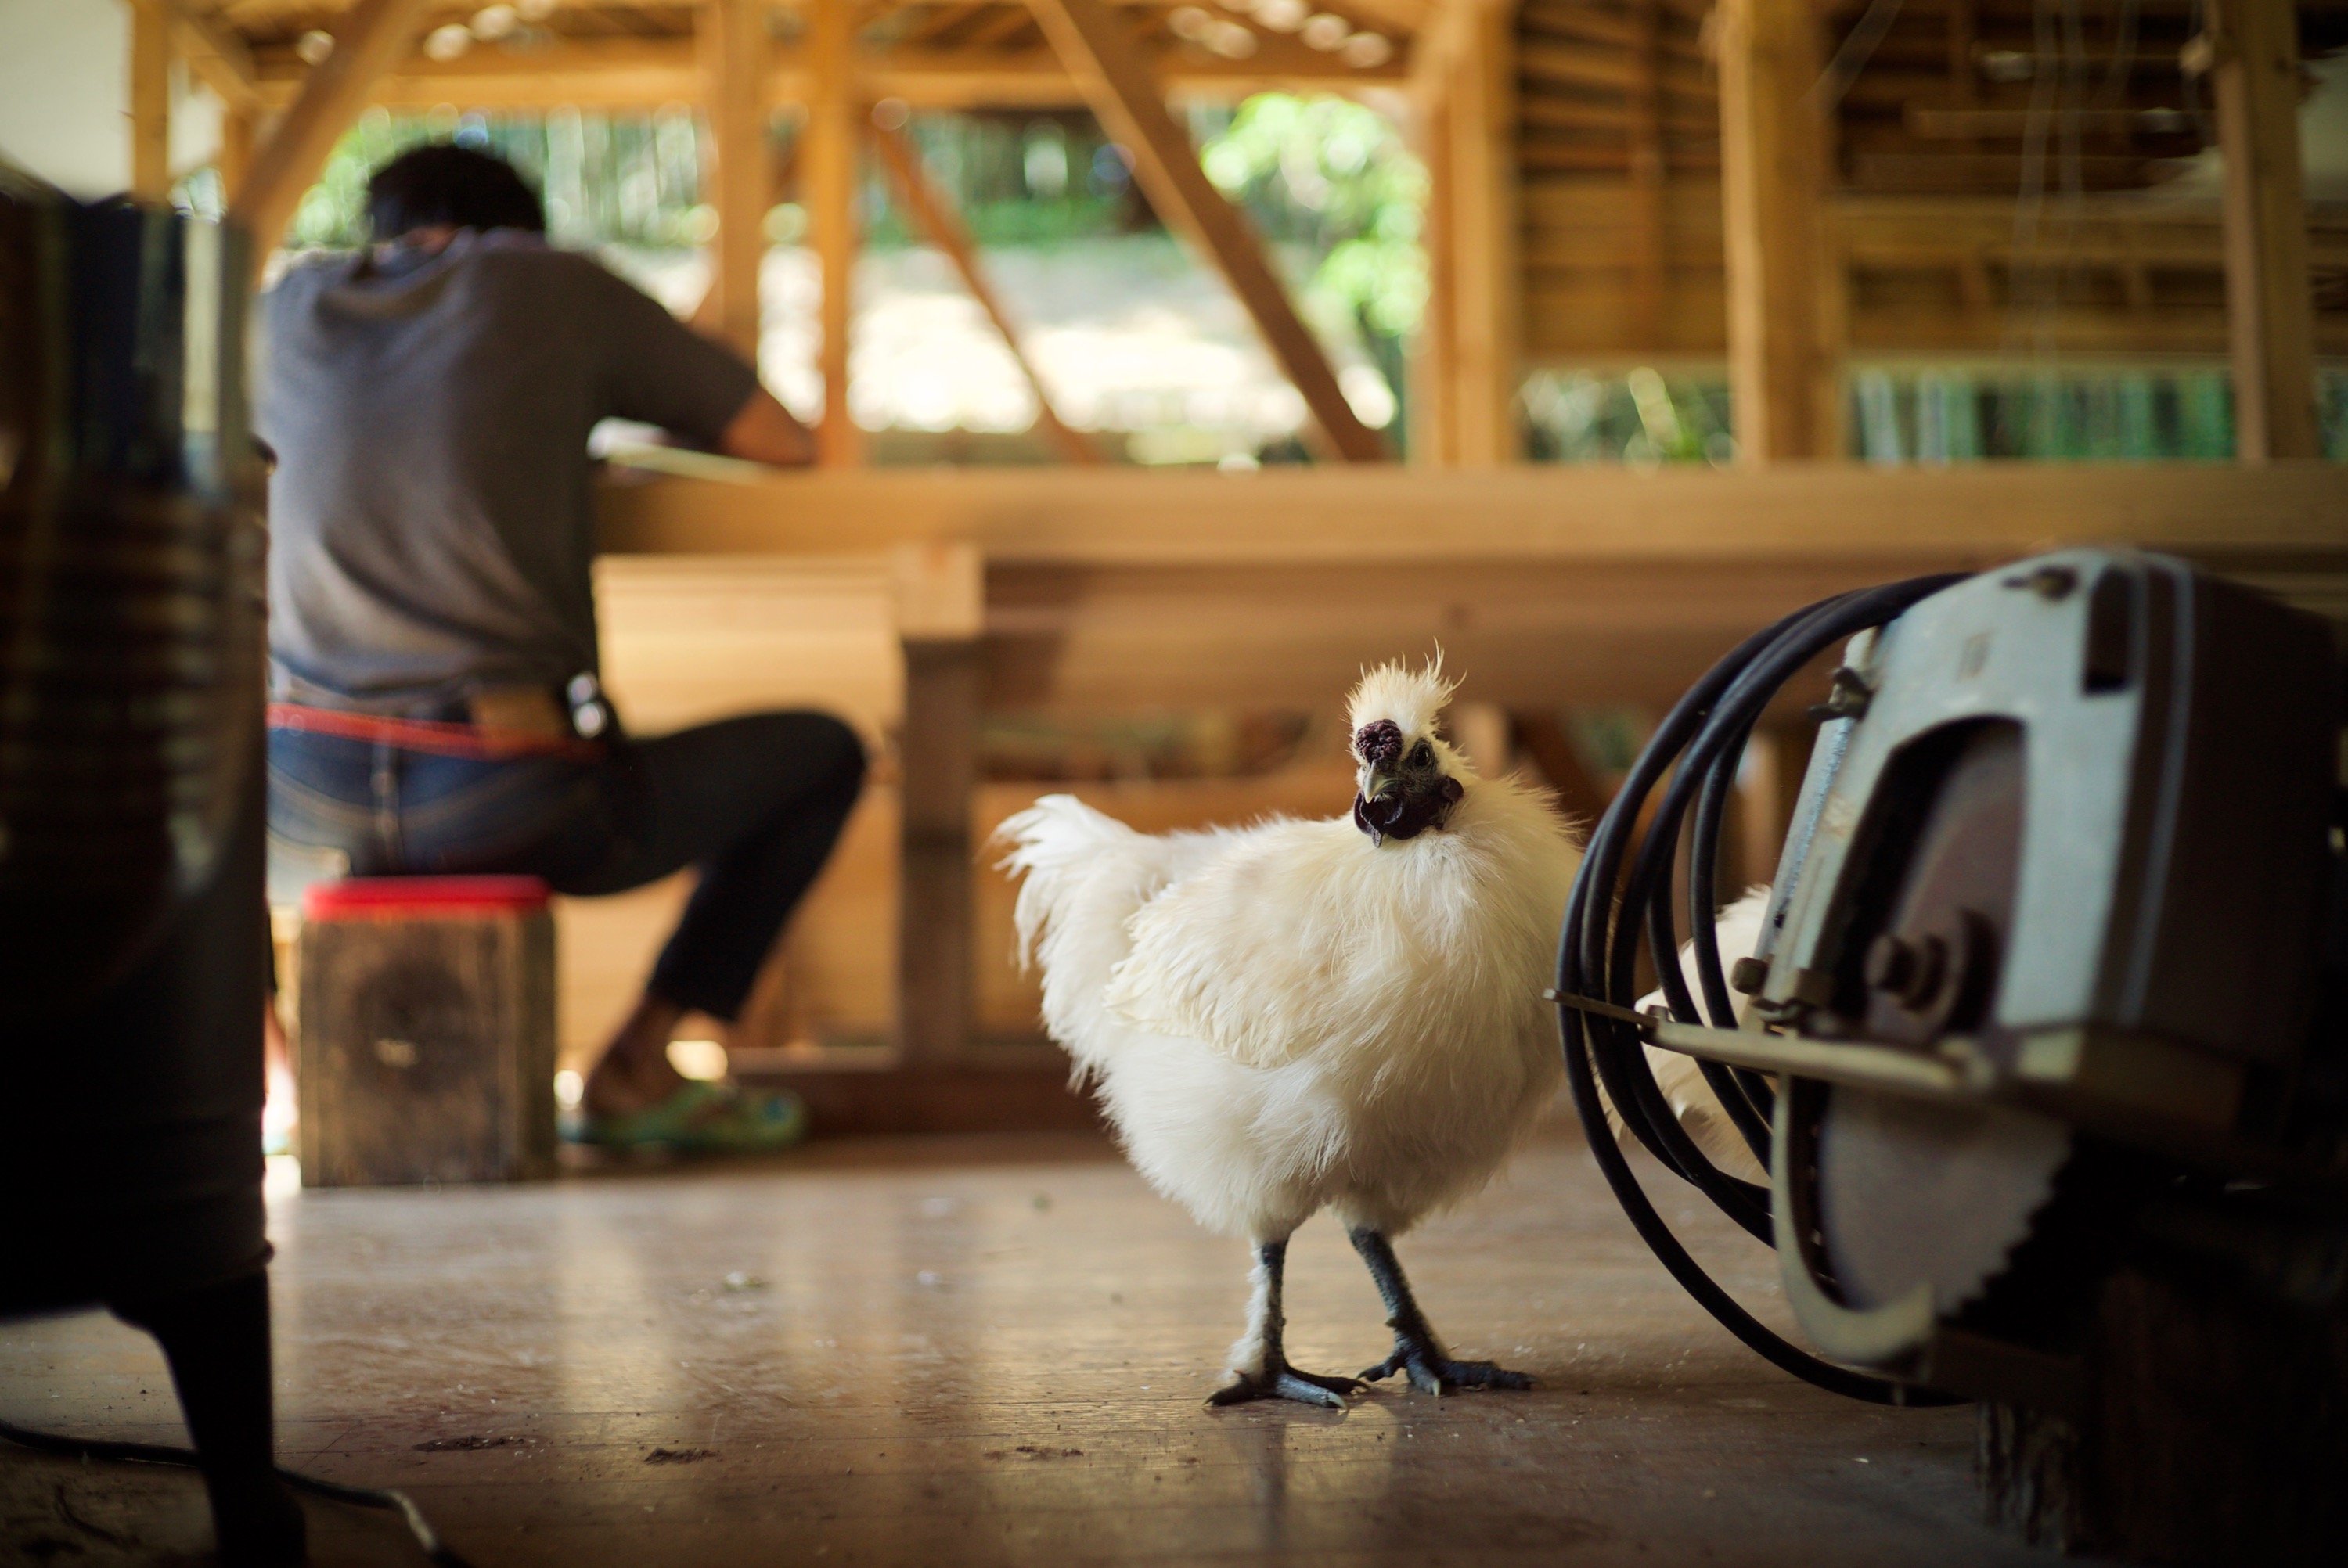
日に日にガンダムみたいになってきたクロちゃんの横にあるのは杉山さんが、これ使えと持ってきてくれた刃が二枚付いた丸鋸で30mm(1寸)の平ホゾが一発で出来る優れもの。しかし我が家の電力では使えなかった、残念。
Kuro-chan looks Gundam. Next to him is the one tool which has two saws in it to make tenons in one motion. Snsei lend me that. Unfortunately I don’t have enough power to use it.
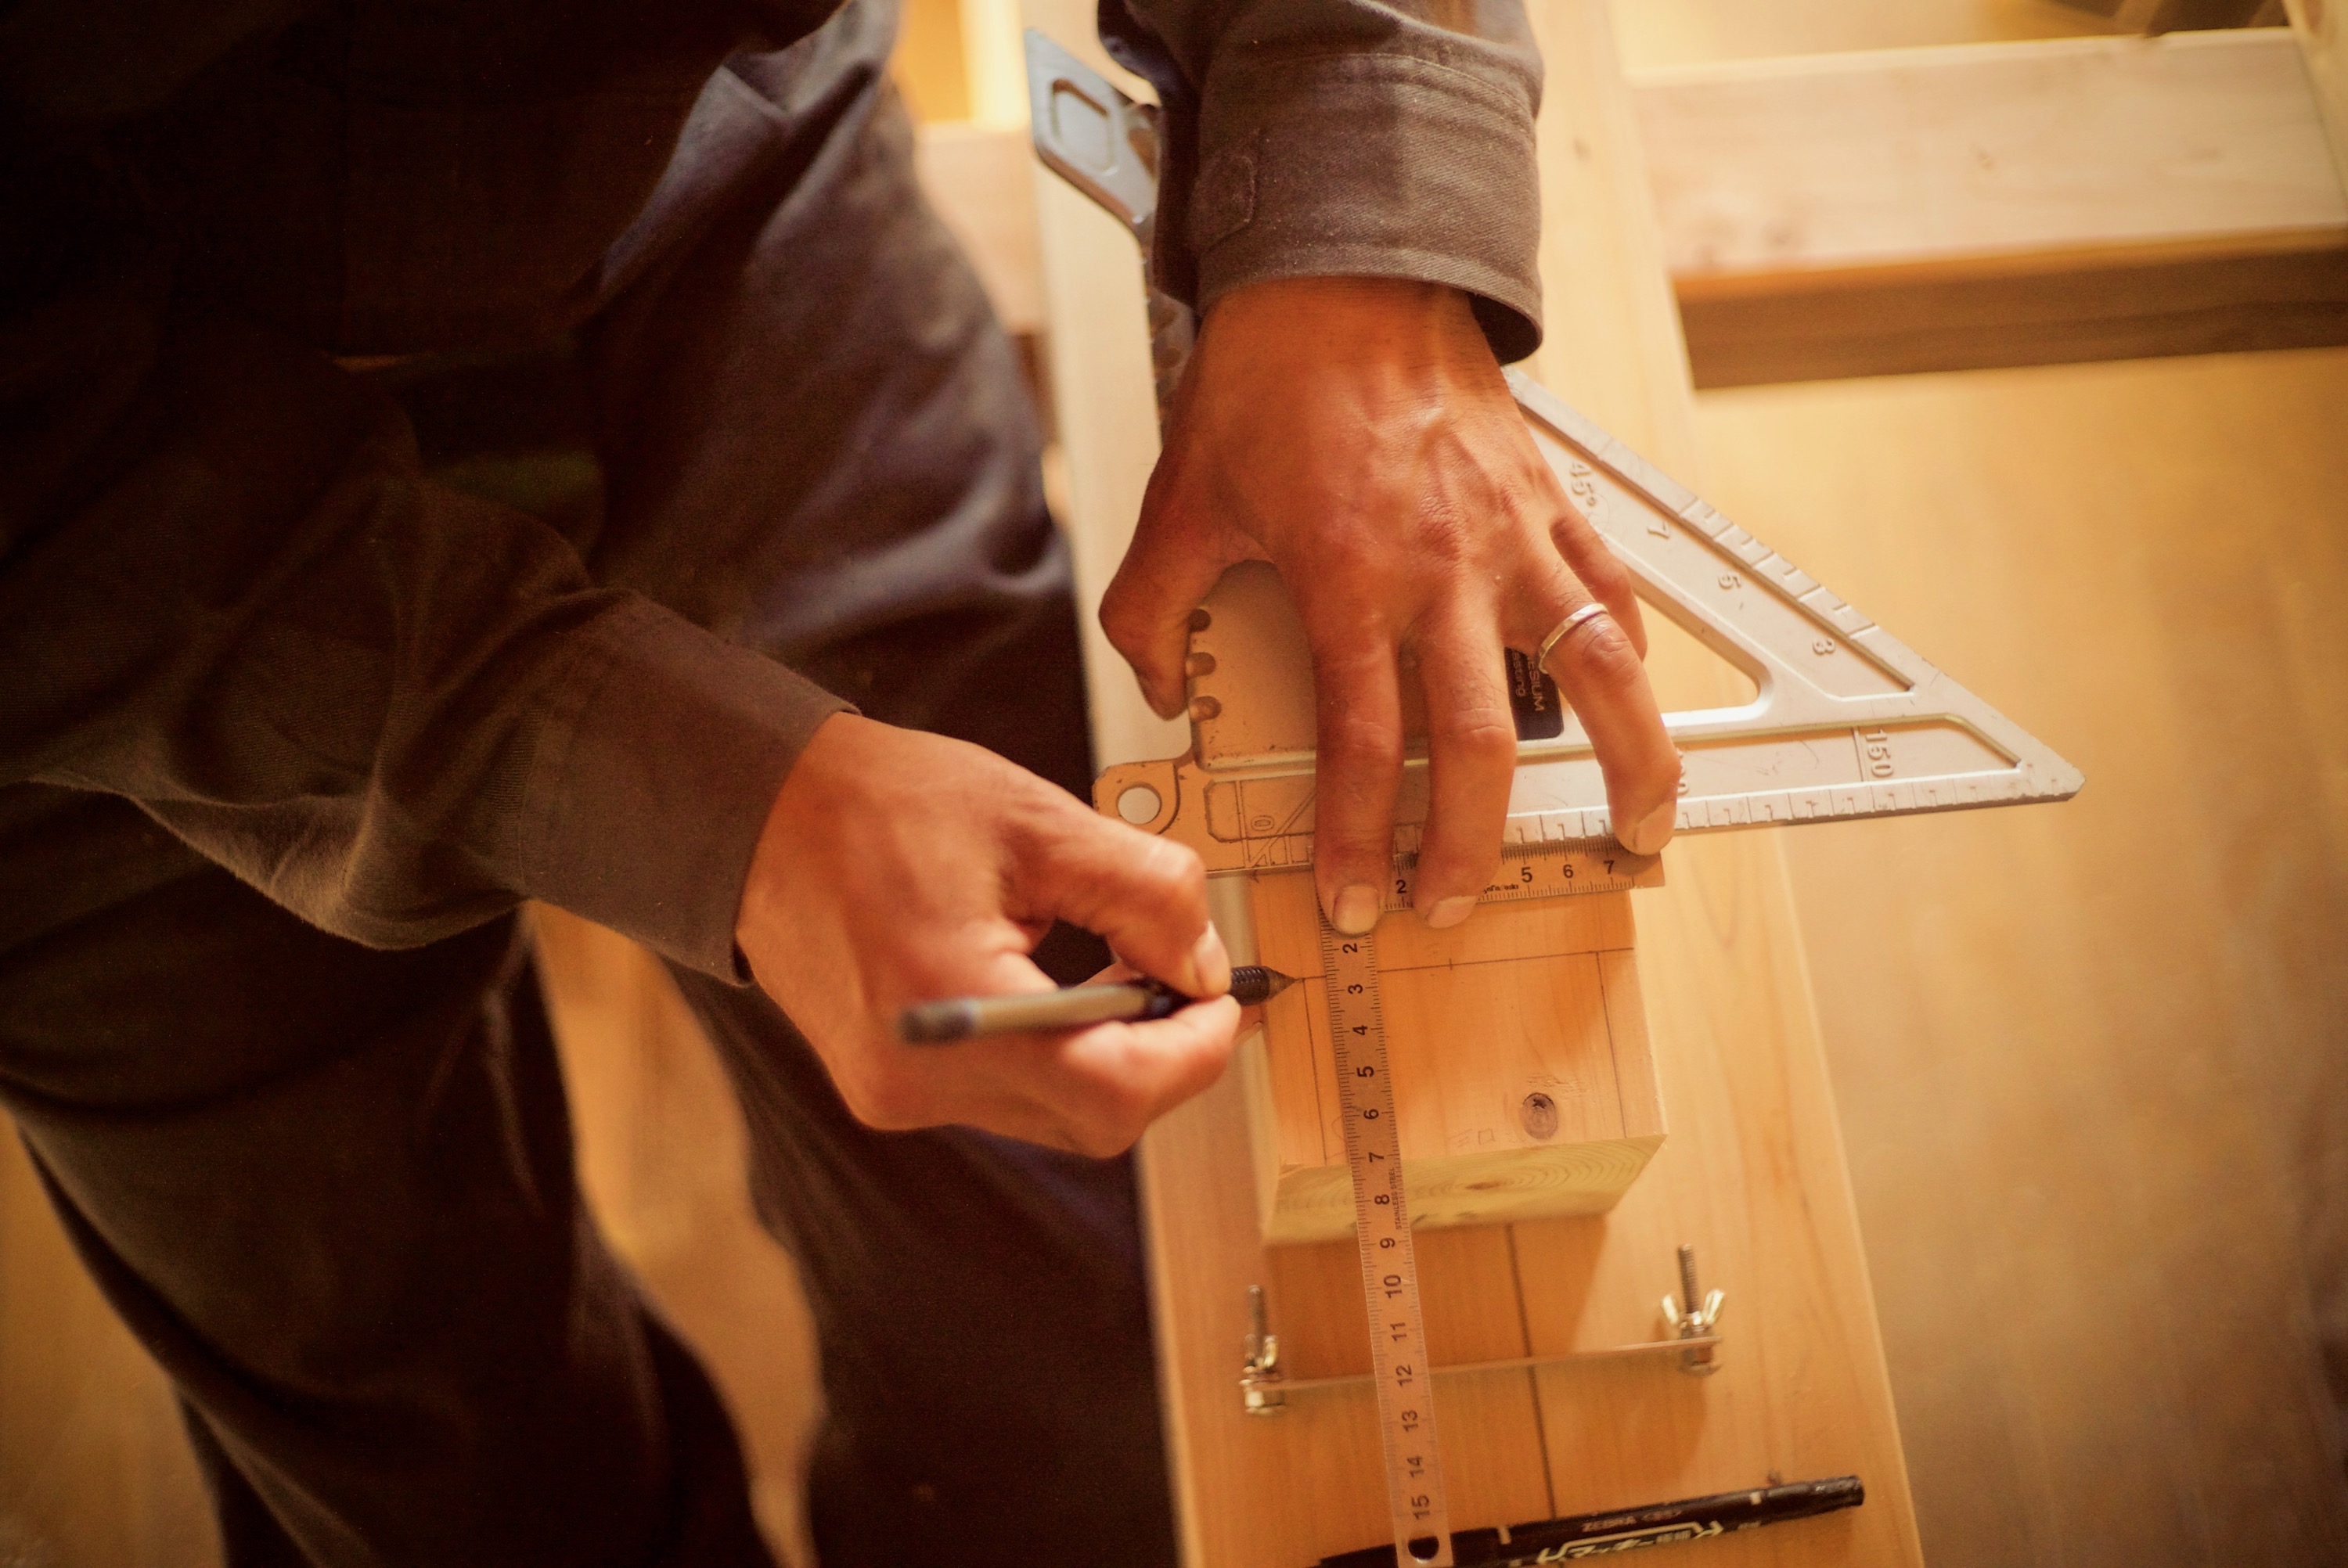
今回の墨付けには丸鋸用のガイド定規と小さな差金に自作した材の中心線を引くための治具が大活躍、竹で墨差しと呼ばれる墨付け用のペンも作ったが間違えて書き直すことが多いのと基本全て化粧材なので持ってた0.7mmのシャーペン(高校の時の機械製図用)を使用。
For Marking I used a guide for a circular saw, a right angle scale and a jig I made to get the center line of the logs. Also a 0.7mm pencil(one I used for drafting in high school) to line it.

長い材を先に墨付けし余分な部分を切って、その中から出来るだけ無駄が出ない様に短い材の墨付けをした。結果90角は10本余分の予定だったが14本余る事に、余は風呂小屋を作ろうかと模索中。
Started with long one then cut extra parts to mark short ones. That way I don’t waste any woods. I was expecting having ten 3m extra woods but in the end it was fourteen. Ok I can make a bath hut with extras.
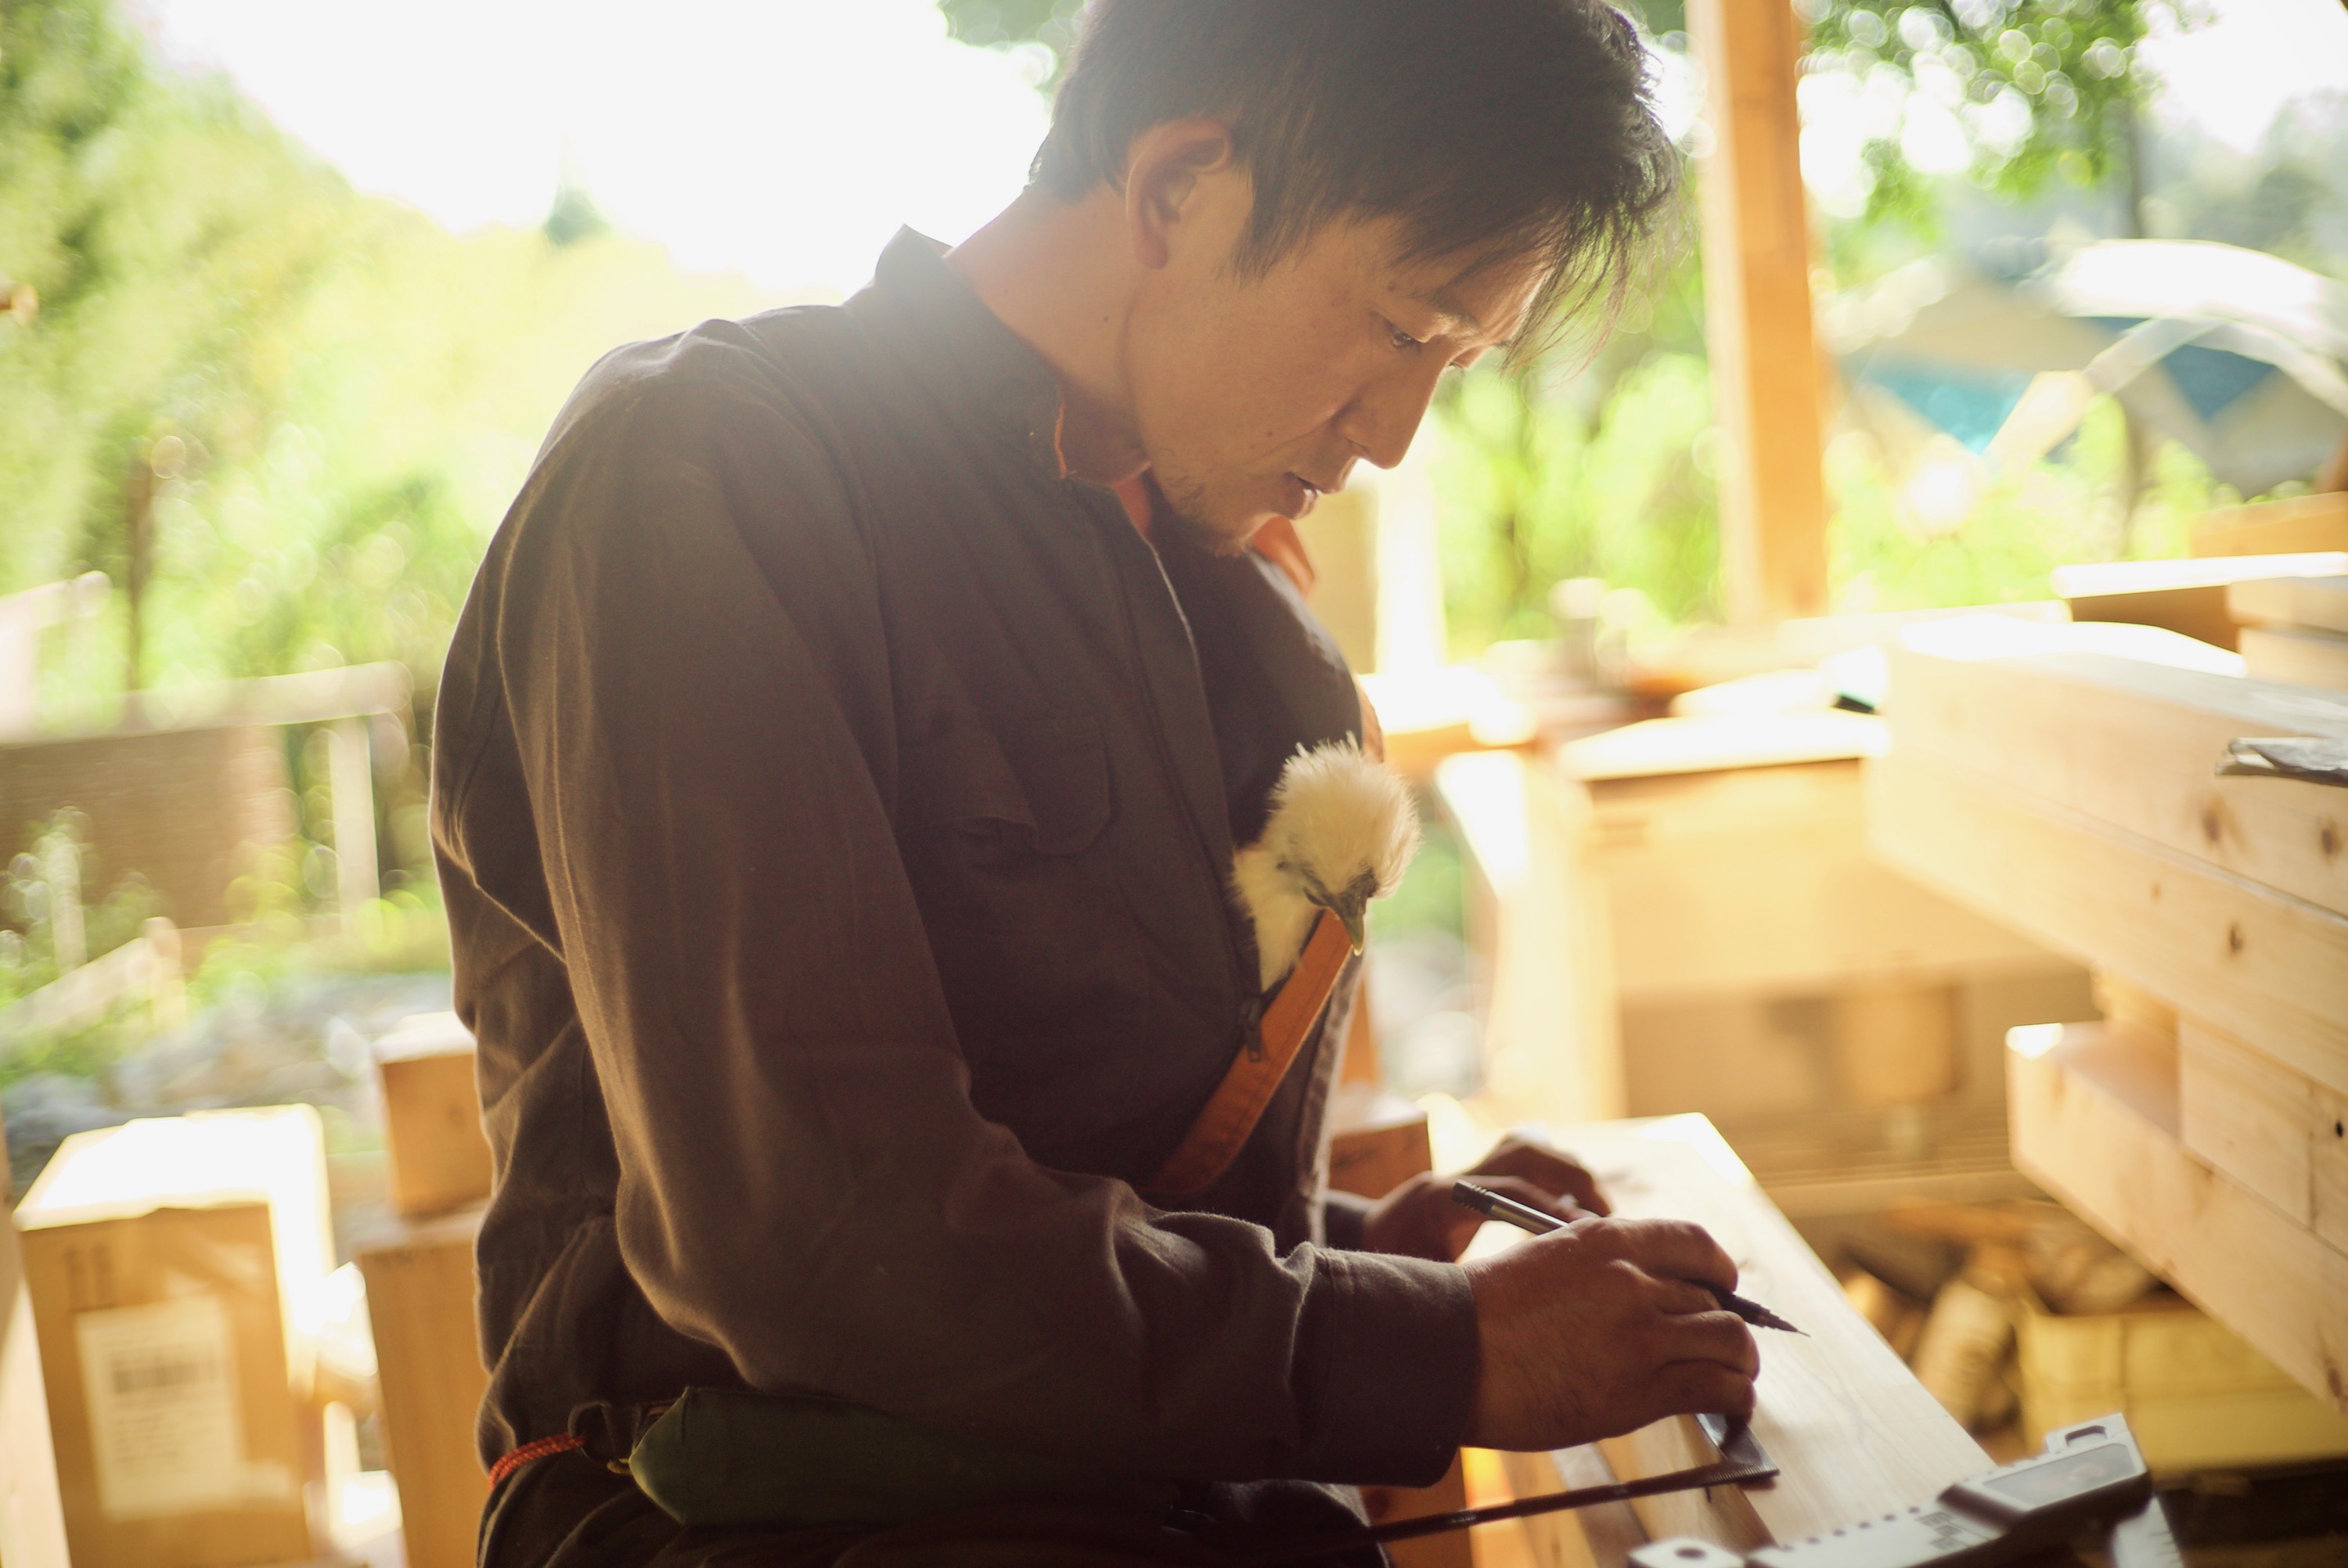
モエちゃんを懐に入れると暖かい~
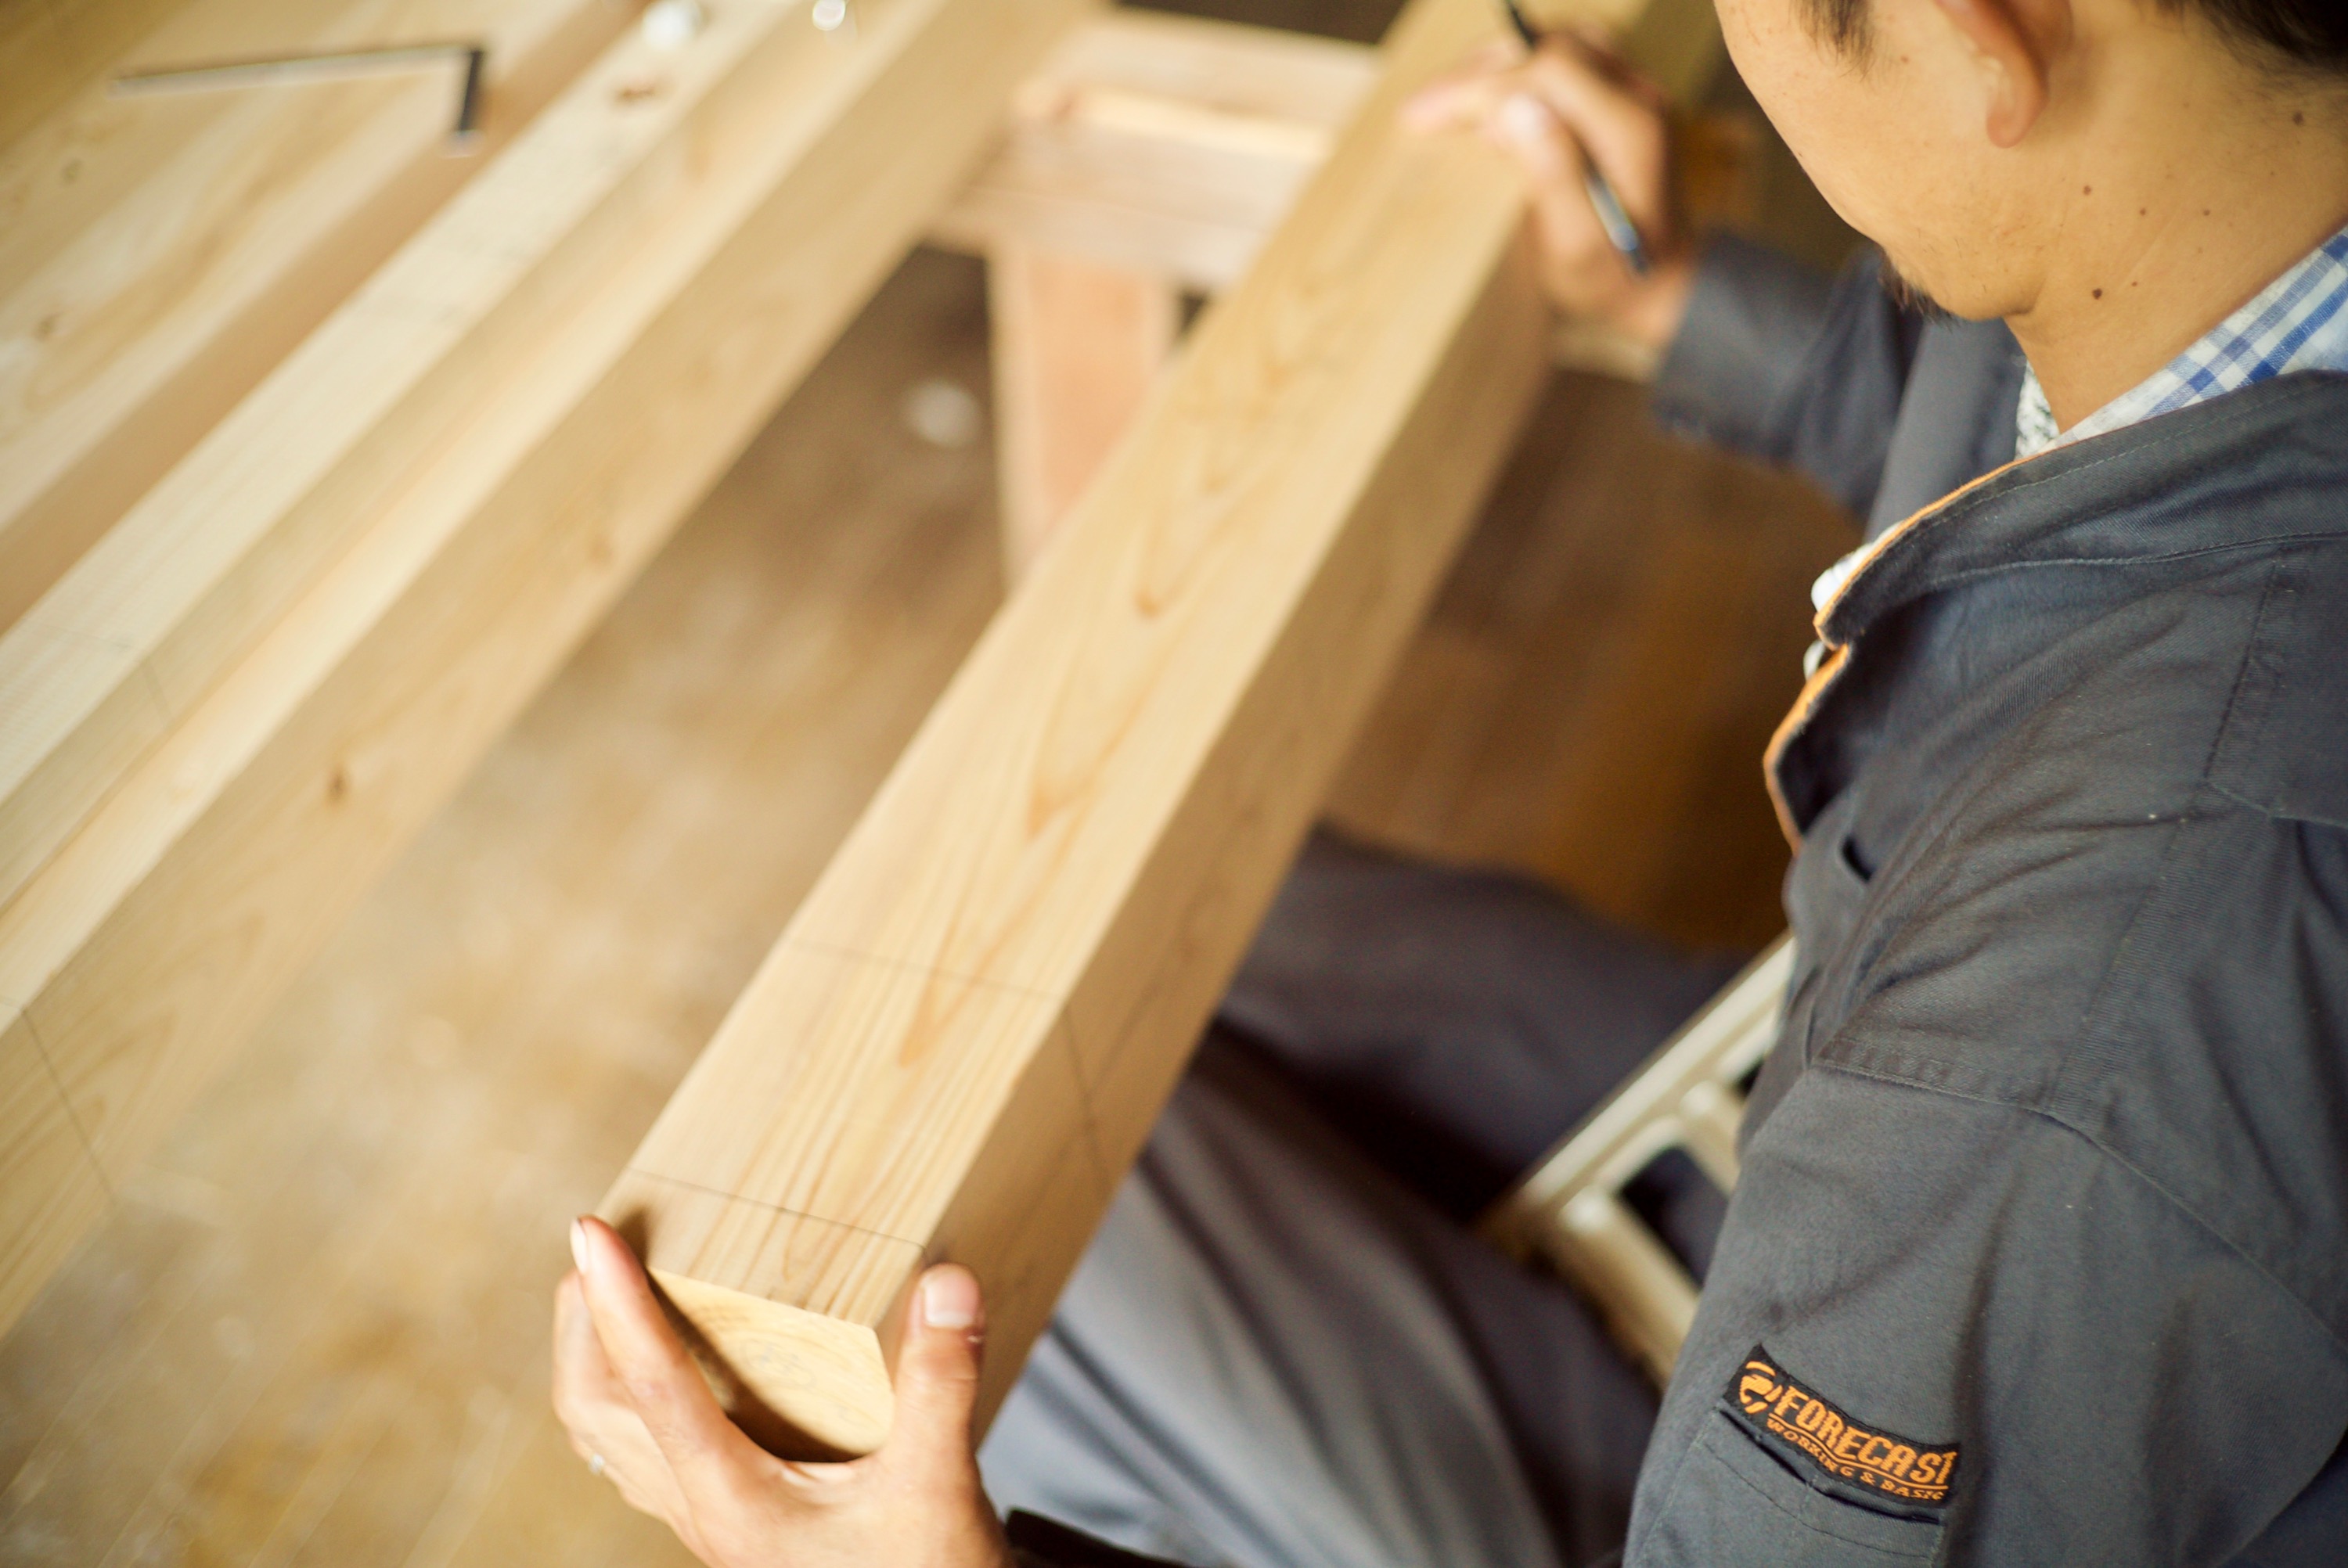
実は墨付けの前に細かい部分の設計は終わってなかった。図面上では上手くいってても組むことを想像しながら墨付けしてると、あれ?これじゃあ組めないな~てとこが出てきて仕口を変更したり、継ぎ手を足したりと調整しながらの作業になり予定の一週間をオーバーする事に、出来るだけシンプルにと考えつつだけど、なんせ素人なのに伝統工法なんてもんに手を出したんだからしょうがないよね~でも墨付けすると建てる小屋のイメージャが格段に上がるから楽しい作業だった。
Moet is so warm and I like he be in my clothe though she don’t like being still for a long time.
The planning for the hut wasn’t finished yet when I started marking because I couldn’t. But when I started the marking I was able to image it more clearly. So I changed many parts. Well it the work that a profecional carpenter would do and I don’t have much experience on that field. But you know what I love this process. Now I can image the hut 360°.
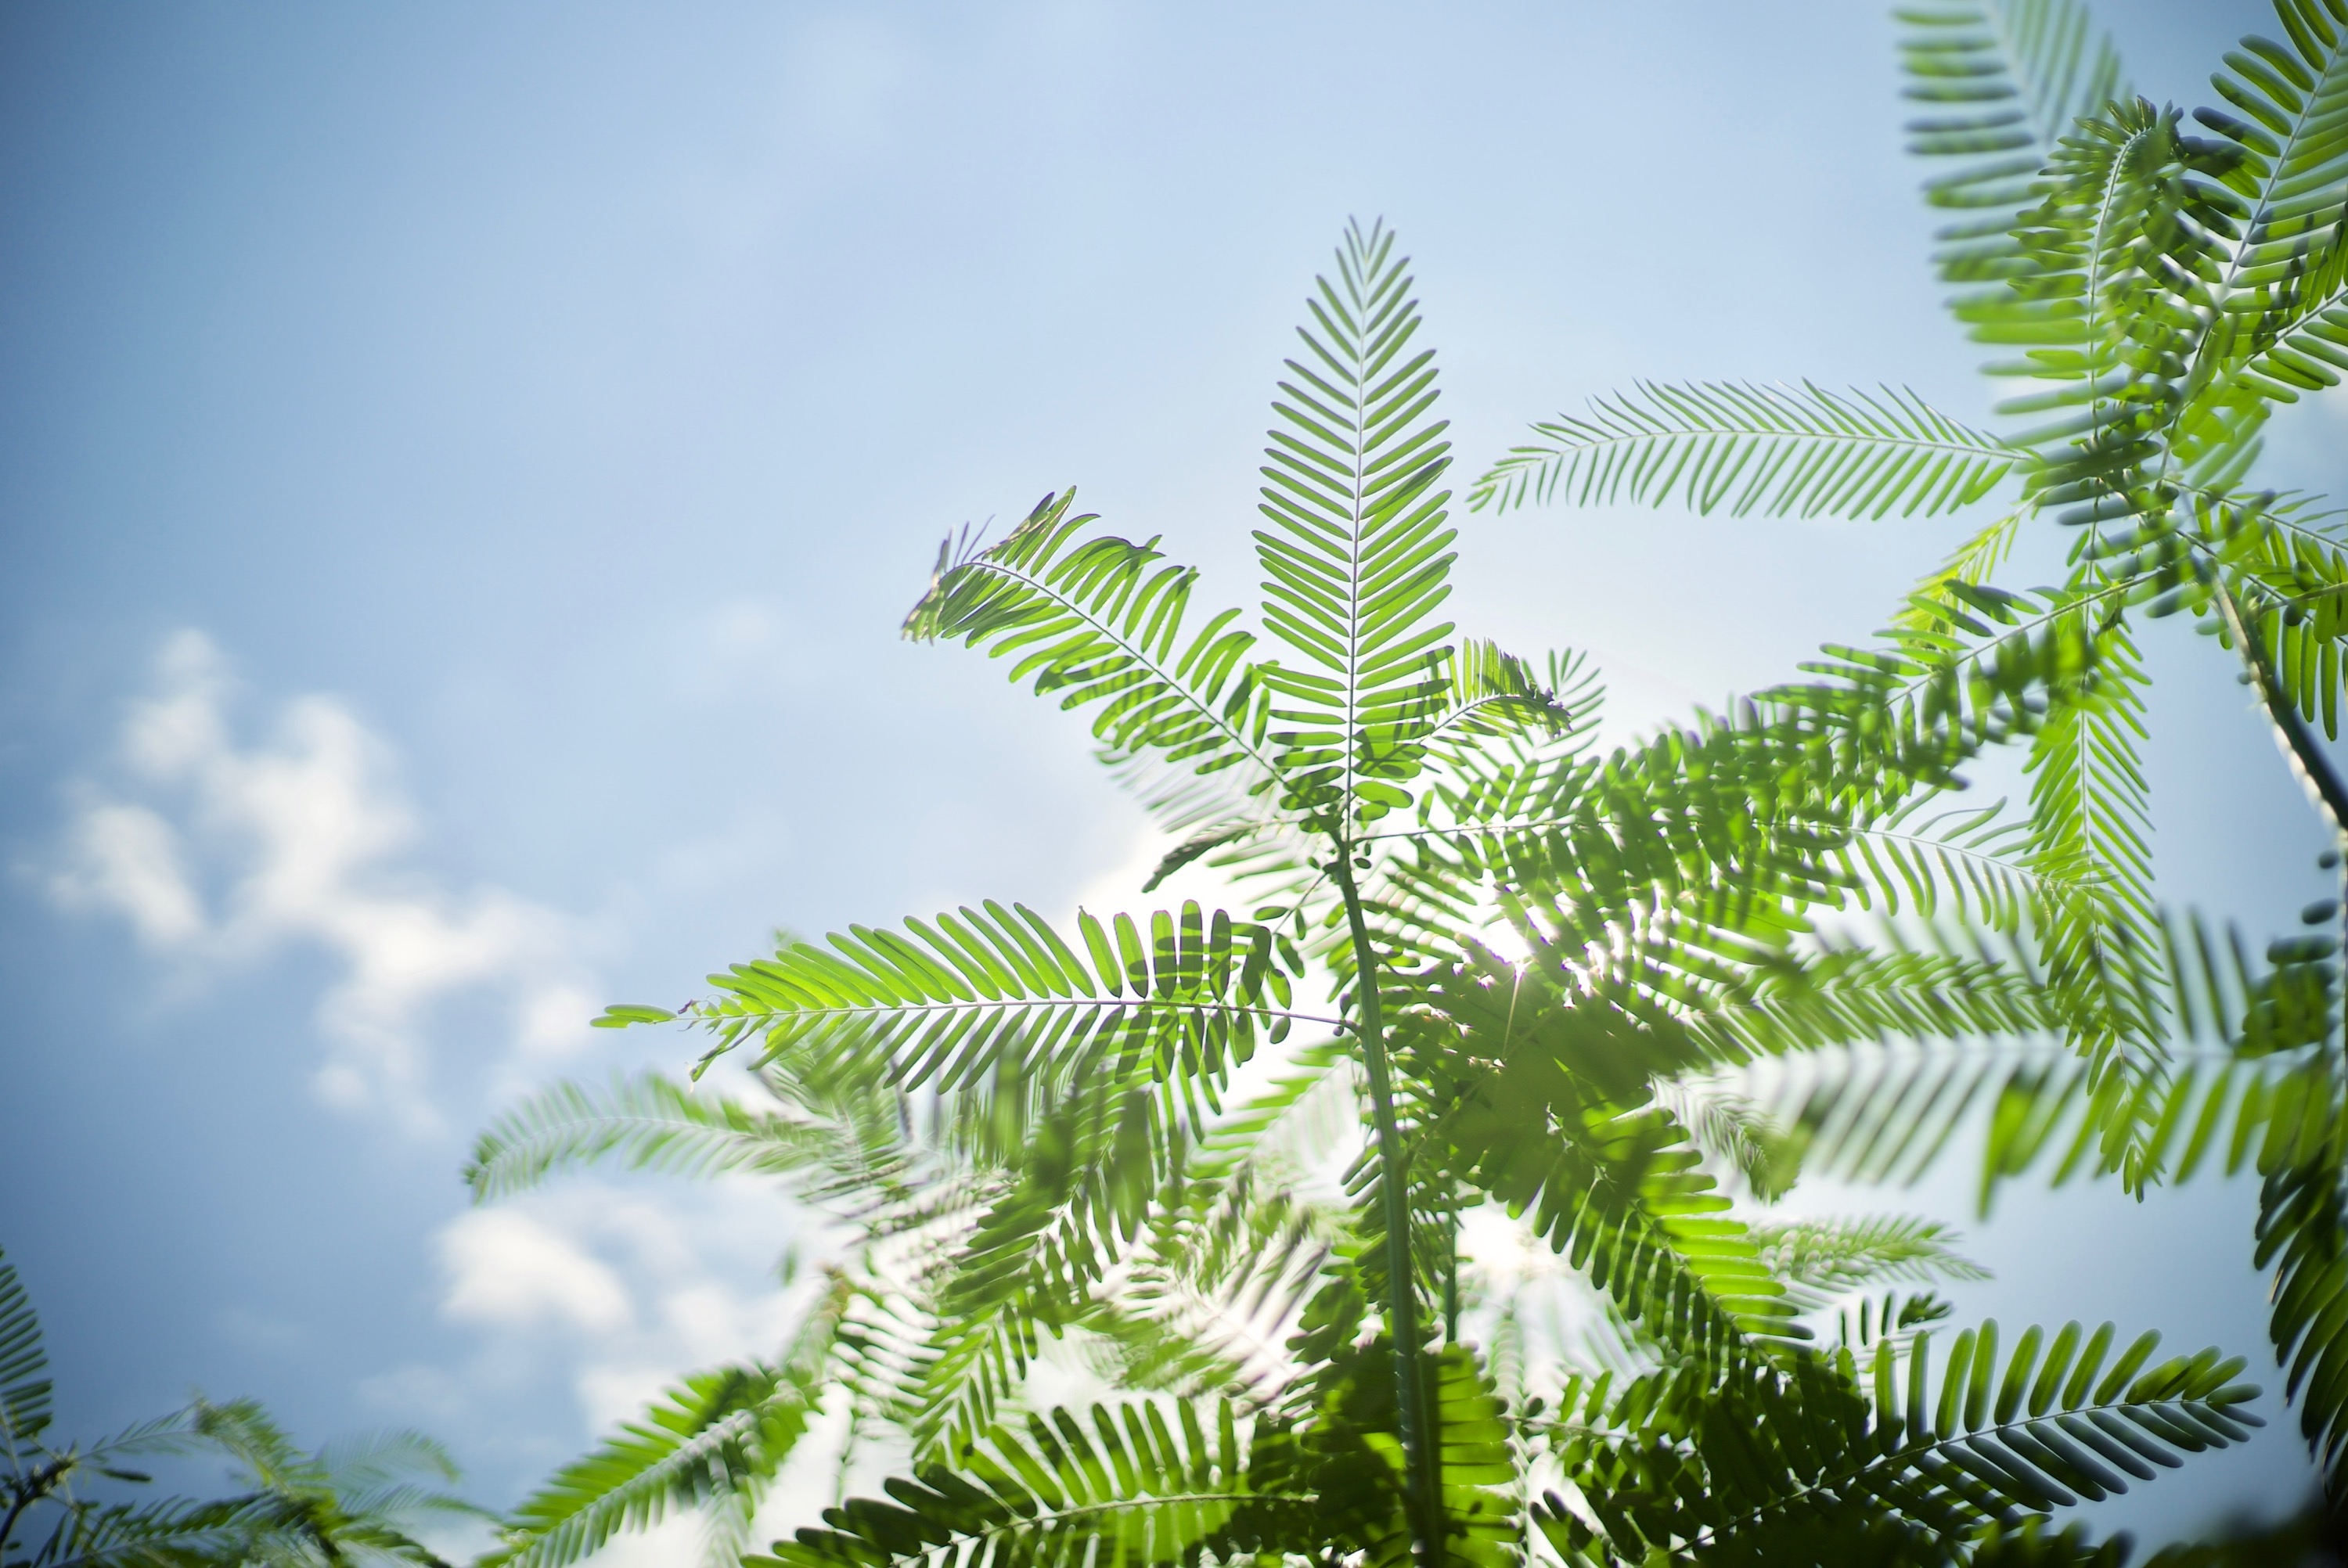
この植物はセスバニア、マメ科で背高は3mを超え直根を1~2m伸ばすらしい。マメ科なので窒素固定作用もあるみたいだけど、期待してるのは長い直根で粘土層を貫き排水を良くする事。さてさてどうなるのかな~次回は刻みに入りまーす。
This plant called sesbania has amazing skills. It’s not only legume which fixes nitrogen but glow toll over three meters having one to two meters straight root down the earth. That root will be a path for the water and make the drainage better on our garden. The next is cut and shap the woods.
コメントを残す